How to Repair Cracked Spa Table Vinyl in 7 Steps
Quick Summary
To repair cracked spa table vinyl, first identify whether the damage is a hairline surface crack, a split through the vinyl, or edge damage. Then clean the area and choose a kit made for flexible vinyl, since spa table vinyl is upholstery-grade PVC. Small, contained damage can be patched, while widespread cracks or crumbling foam usually call for replacement.
- Hairline surface cracks need a liquid repair compound or color-matched filler, not a patch.
- Choose kits labeled flexible vinyl, marine vinyl, or PVC, not just vinyl.
- Avoid craft glue and super glue, which cure hard and crack again under body weight.
- Let exposed foam set with flexible filler before patching, since wet foam traps moisture.
- Replacement makes more sense when cracks span several areas or the foam is crumbling.
Table of Contents
- What a Spa Table Is and Why Its Vinyl Cracks
- Identifying the Type, Size, and Location of the Crack
- Choosing a Vinyl Repair Kit for Upholstery
- Cleaning and Preparing the Damaged Vinyl
- How to Patch a Tear in Vinyl Step by Step
- Curing, Sealing, and Testing the Repair
- When Spa Bed Vinyl Replacement Makes More Sense
- Preventing Cracks in Vinyl Upholstery Going Forward
- Frequently Asked Questions
How to Repair Cracked Spa Table Vinyl in 7 Steps
Last Updated: November 1, 2026
A cracked spa table is more than an eyesore. It can leak, trap bacteria in the foam beneath, and make clients feel uneasy before the treatment even starts. The good news is that many cracks can be fixed in an afternoon with the right materials and a careful approach. This guide walks through the process one step at a time, so you know which method fits your damage.
What a Spa Table Is and Why Its Vinyl Cracks
A spa table is the treatment bed used for massages, facials, and body wraps. Its top is usually a foam core wrapped in vinyl, a flexible plastic-coated fabric that is easy to wipe clean. Vinyl is durable, but it is not indestructible. Repeated bending, sharp edges, harsh cleaners, and sun exposure all weaken it over time.
Cracks tend to form at the edges, near the stirrup area, and along seams where the vinyl flexes most. Once the surface splits, moisture and oils can reach the foam, which is why small cracks should be addressed early. Maintaining the integrity of these materials requires a consistent approach to preventing leather cracks that mirrors the care needed for automotive upholstery.
Identifying the Type, Size, and Location of the Crack
Before you buy anything, look closely at the damage. Is it a surface crack, a split that goes through the vinyl, or a tear that exposes the foam? Measure its length and note whether it sits on a flat area or a high-stress bend.
- Hairline crack: Surface only, often from dryness. A vinyl kit or conditioner may be enough.
- Split or tear: Goes through the vinyl. Needs a patch and adhesive.
- Edge or seam damage: Harder to fix because the area flexes constantly. Watch out: a poor patch here will lift within days.
Press gently around the crack. If the foam feels soft or spongy, plan to address that too before patching. If the damage sits near the stirrup area, you can browse replacement stirrups for treatment tables.
Choosing a Vinyl Repair Kit for Upholstery
Spa table vinyl is a flexible, upholstery-grade PVC, and the kit you choose has to match that material, not the rigid vinyl used on car dashboards or the thin film used on inflatables. Use this decision guide to match the kit to your damage.
Match the kit to the damage type:
- Hairline surface cracks (no foam exposure): A liquid vinyl repair compound or a color-matched filler kit is enough. These flow into the crack and cure flexible. Skip patches here, a patch on a hairline crack adds a stiff edge that peels within weeks.
- Splits and tears through the vinyl: You need a kit with a backing patch plus a flexible adhesive, or a heat-activated patch kit. The backing carries the load so the adhesive does not have to.
- Edge, seam, and high-flex damage: Look for a kit explicitly labeled for flexible or marine-grade vinyl.
Verify compatibility before you buy:
- Check the label for "flexible vinyl," "marine vinyl," or "PVC", not just "vinyl."
- Confirm the adhesive is a vinyl-specific contact cement or a heat-activated film. General-purpose craft glue and cyanoacrylate (super glue) cure hard and brittle and will crack again under body weight.
- Confirm the kit includes color matching or tinting, since spa table vinyl is usually a solid color where a mismatch shows.
- Check the cure time and whether the kit needs heat (a hair dryer or heat gun on low) or cures at room temperature.
What a complete kit should contain: a flexible filler or repair compound, a backing patch sized for the tear, vinyl-compatible adhesive, a plastic squeegee, fine-grit sandpaper or a prep wipe, and color tint if your table is not white or black. If a kit is missing the backing patch, buy one separately, do not substitute paper or cardboard, which will wick moisture into the foam.
Vinyl repair kit selection guidance
The table below sums up which kit fits each type of damage and what to check before you buy.
SkinAct Disinfecting Multi Purpose Cleaner for Upholstery →
| Damage type | Kit to choose | Key check |
|---|---|---|
| Hairline surface crack | Liquid vinyl repair compound or color-matched filler | No patch needed; patches peel on hairlines |
| Split or tear through vinyl | Backing patch with flexible adhesive or heat-activated kit | Backing carries the load |
| Edge, seam, high-flex damage | Kit labeled for flexible or marine-grade vinyl | Must be explicitly flexible |
| Any vinyl repair | Label says flexible vinyl, marine vinyl, or PVC | Not just "vinyl" |
| Adhesive | Vinyl-specific contact cement or heat-activated film | Avoid craft glue and super glue |
| Non-white or non-black table | Kit with color matching or tinting | Mismatch shows on solid colors |
Cleaning and Preparing the Damaged Vinyl
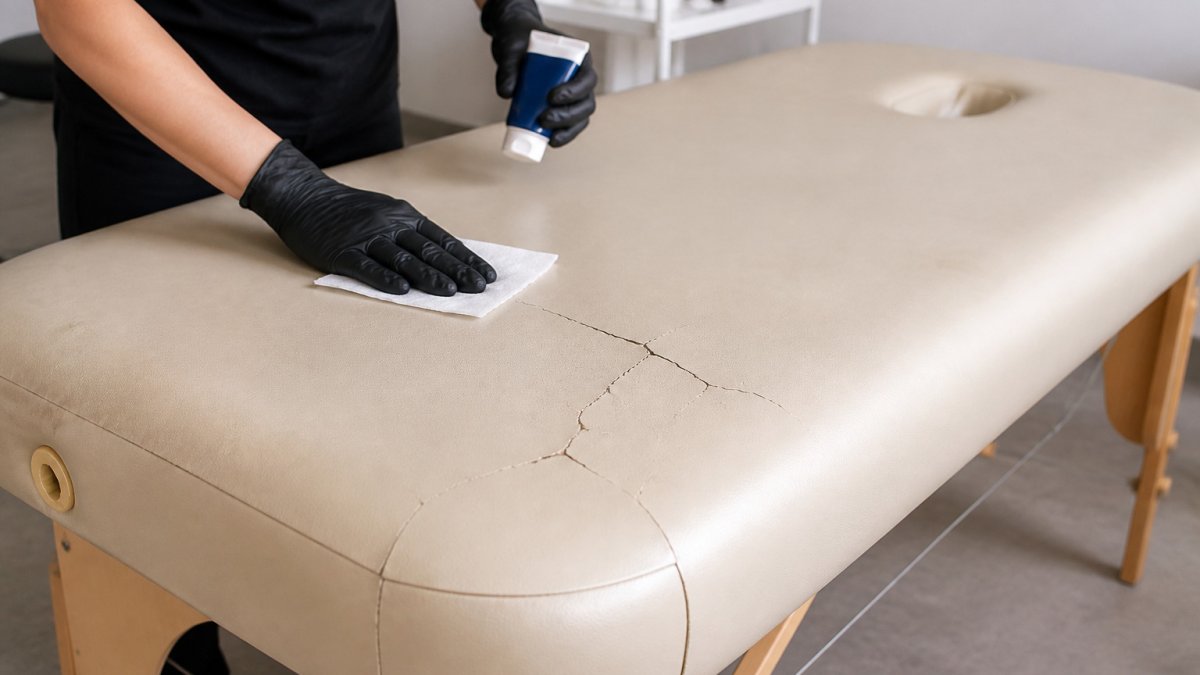
Clean the area before any repair. Oils and residue will stop adhesive from bonding. Use a mild, non-abrasive cleaner such as the SkinAct Disinfecting Multi Purpose Cleaner for Upholstery, which removes dirt, stains, and grease from upholstery and vinyl. Wipe the area and let it dry fully.

Sand the edges of the crack very lightly with fine-grit paper so the adhesive has more surface to grip. Wipe away dust before moving on.
How to Patch a Tear in Vinyl Step by Step
This is the sequence that holds up under daily client weight. Work in a well-ventilated area and let the table come to room temperature first, adhesive does not bond well to cold vinyl.
- Clean and dry the area. Wipe with a mild, non-abrasive vinyl cleaner and let it dry completely. Any oil or lotion residue will stop the adhesive from bonding.
- Lightly scuff the repair zone. Use fine-grit sandpaper (around 220-320 grit) on the vinyl immediately around the tear, not inside it. Wipe away dust with a dry cloth.
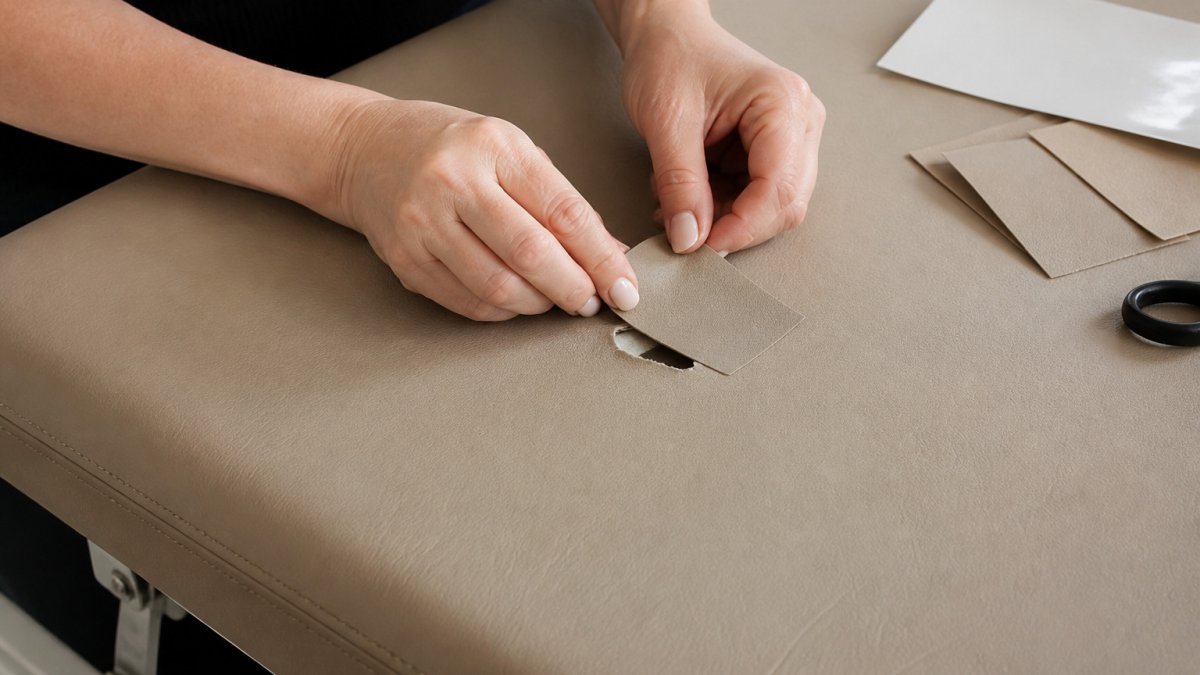
- Size the backing patch. Cut it so it extends about 1/2 inch beyond the tear on every side. For a tear longer than 2 inches, round the patch corners, square corners catch and lift first.
- Address exposed foam first. If the tear reaches the foam, apply a thin layer of flexible filler into the gap and let it set before patching. Patching over wet or crumbling foam traps moisture and the repair will fail.
- Apply adhesive to both surfaces. Coat the back of the patch and the vinyl around the tear. Let both sit for the open time on the label, usually a few minutes, until tacky, not wet.
- Set the patch. Lower it over the tear, align it with the vinyl grain or texture, and press from the center outward with a plastic squeegee to push out air. Work in one direction; do not lift and reposition, which stretches the adhesive.
- Fill the seam. Apply color-matched flexible filler over the patch edges and any remaining gap, feathering it thin at the edges so it does not create a ridge.
- Cure fully. Follow the label, typically several hours at room temperature, longer in cool rooms. Heat-activated kits need a hair dryer or heat gun on low, held moving, until the patch turns from cloudy to clear.
After curing: press firmly around the patch and gently flex the area. If edges stay down and the surface is smooth, the bond is sound. Wipe with a damp cloth to confirm the patch does not peel or discolor before the table goes back into service.
Curing, Sealing, and Testing the Repair
Once the adhesive is set, avoid placing weight on the repair for at least the full cure time. Heat-activated kits may need a hair dryer on low to bond the layers.
To test the repair, press firmly around the patch and gently bend the area. If the edges stay down and the surface stays smooth, the bond is sound. Wipe with a damp cloth to confirm the patch does not peel or discolor.
When Spa Bed Vinyl Replacement Makes More Sense
Patching works well for small, contained damage. Replacement is the better choice when cracks run across multiple areas, the foam is crumbling, or the table is so worn that repeated repairs look patched together. Many practices compare the cost of several repairs against the price of new vinyl or a replacement part and find that replacement is simpler. Browse replacement parts for your table model before you decide.
If you are weighing a new table entirely, our guide to affordable alternatives to high-end aesthetic treatment beds can help you compare options. Practitioners who want to add services that make better use of a well-maintained table can also explore Online Service Training for Estheticians.
Preventing Cracks in Vinyl Upholstery Going Forward
Prevention is cheaper than repair. Clean the table with a gentle, pH-balanced product after each client, avoid sharp objects on the surface, and keep the table away from direct sun and heat sources. Store any portable tables flat or upright, never folded under pressure.
Regular conditioning keeps vinyl flexible, so it is less likely to split. Check the table monthly for early hairline cracks, and address them before they spread. A few minutes of care each month can extend the life of your treatment bed considerably.
Frequently Asked Questions
Can a waterlogged hot tub cover be fixed?
A waterlogged cover can sometimes be dried out and repaired if the vinyl or foam core is not broken down. Remove the cover from the frame, let it air dry fully in a shaded, ventilated area, and inspect the underside for mildew or soft foam. Small tears can then be patched with a vinyl repair kit. If the foam core has crumbled or the cover smells persistently musty, replacement is usually the more reliable option because moisture trapped inside can keep damaging the material.
Can cracked spa table vinyl be repaired?
Yes, most surface cracks and small tears in vinyl spa table upholstery can be repaired with a vinyl repair kit, provided the material is still flexible and the crack has not split through to the padding. Clean the area, apply a vinyl patch or adhesive, and allow it to cure fully before use. Large splits, cracks along seams, or vinyl that has become brittle and flakes when touched are better handled by replacing the cover.
What vinyl repair kit works for spa table upholstery?
Look for a kit labeled for vinyl upholstery that includes color-matched patches, a flexible adhesive or heat-activated material, and a clear sealant. Match the color and grain of the patch to your table as closely as possible. Kits that combine a backing cloth with a vinyl-coated surface tend to bond well to spa table covers. Test the adhesive on a hidden area first to confirm it does not discolor the surrounding vinyl.
When should cracked spa table vinyl be replaced instead of repaired?
Replace the vinyl when cracks are widespread, when the material has stiffened and no longer bends without splitting, or when damage runs along high-stress seams that a patch cannot hold. Replacement is also worth considering if the foam padding underneath is compressed, water-damaged, or contaminated. A patch can cover a single tear, but repeated patching on an aging surface often leads to new cracks around the edges of each repair.